When multiple microservices are moving through a release cycle from development, test, UAT to production, it is a big setback to on-demand release process to update environment specific properties like DB connection strings, message broker parameters, email server properties etc. for each of the environments.
Spring Cloud Config server resolves this issue, by moving the properties out of the applications and centralizing them. There is no need to keep updating properties from one environment to the other, as applications move along in the release process. This offers a lot of flexibility and speeds up the entire deployment cycle.
With Config server, you have a central place to manage the properties across all environments.
Download sample code from my microservices Github repo
Git Repository
For a configuration server to serve properties to client applications, it needs to be pointed to the source where properties exist. While you can use a file system or database, in this post we focus on Git repo backed Config server which is the most common set up.
Create an empty folder called config-properties-env anywhere on your system and inside the folder create a file called clientapp.properties. Add the following to the file and save.
message=I am a property from Config server for Development Environment
Initialize a Git repo, add the file and commit.
|
1 2 3 |
git init git add client.properties git commit -m"dev properties" |
Config server
Standing up Spring Cloud Config server is very easy, it is like any other microservice with an additional annotation and a dependency.
Go to the Spring Initializr site https://start.spring.io/ and in the dependencies search box, add Config server, web dependencies and click on Generate Project to download an empty Spring boot project.
Add @EnableConfigServer annotation to the main class, as shown below.
Add the following to the application.properties file.
|
1 2 3 4 |
server.port=8888 spring.cloud.config.server.git.uri=/mnt/aidata/config-properties-env #(This should be the path to properties file on your system) |
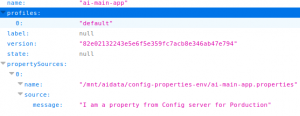
Now run the project and go to http://localhost:8888/clientapp/default, this should show the property you just added to the clientapp.properties.

You have now successfully set up the Config server and ready to serve the properties to the client applications.
Here is the video version of it.
In the next post, I will discuss how client applications can use the Config server to get properties, how to organize properties for different environments, and how to encrypt passwords in property files.

