I recently did a video on distributed logging and tracing with Sleuth and Zipkin in Microservices, watch it here
Category: Microservices
Kafka with Spring Cloud Stream on Docker – part 2
This is a continuation of part 1 on Kafka, Spring Cloud Stream on Docker. In this post, we will be talking about setting up a Spring boot project and configuring binder for Kafka and produce messages. Before we delve deeper, it is important to understand few concepts in Spring Cloud Stream and how it works.
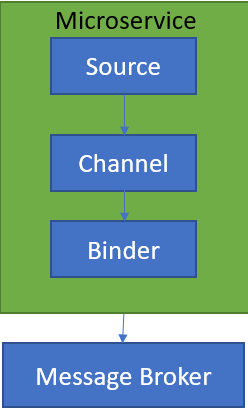
SOURCE
When a microservice is ready to publish a message, it will publish the message using a source. Source identifies the contract between the message producer and the message destination.
CHANNEL
A channel is an abstraction over the actual queue or topic. A channel name is always associated with a target queue name in configuration, which makes it easy to switch queues by changing configuration.
BINDER
Its Spring’s code that talks to a specific message platform, like RabbitMQ, Kafka etc.
To get started, add
|
1 2 3 4 5 6 7 |
@EnableBinding(Array(classOf[Source])) @SpringBootApplication class KafkaDemoApplication{ def main(args: Array[String]): Unit = { SpringApplication.run(classOf[KafkaDemoApplication], args:_*) } } |
Next, configure your application.yml as below.
|
1 2 3 4 5 6 7 8 9 10 11 |
spring: cloud: stream: bindings: output: #maps to source.output in DemoProducer destination: kafkaDemoTopic #kafka topic content-type: application/json kafka: binder: zkNodes: dmira #kafka brokers: dmira #zookeeper |
The above binding maps to a channel called output with Kafka topic called KafkaDemoTopic. It specifies Kafka is the underlying message platform. You can switch this to RabbitMQ, ActiveMQ etc depending on your actual implementation. It also specifies where Kafka and Zookeeper are running. Couple of things to watch out for.
|
1 |
Failed to create producer binding; retrying in 30 seconds. |
You may get above error if port specifications are not correct. I didn’t specify ports as spring already knows default ports for Zookeeper and Kafka.
|
1 |
Magic v1 does not support record headers |
This is a common error, if you forget to add message converters.
Once, you have the above set up, create a message producer to post the messages to the topic as below.
|
1 2 3 4 5 6 7 8 9 10 |
@Component class DemoKafkaProducer { @Autowired private var source: Source = _ def postMessagesToTopic( )={ val lisyStr = List("1", "2", "3") lisyStr.foreach { t => source.output.send(MessageBuilder.withPayload(t).build) } } } |
That’s all you have to do. Check your Topic for messages.
|
1 2 3 4 |
C:\kafka_2.11-2.1.0\bin\windows>kafka-console-consumer.bat --bootstrap-server dmira:9092 --topic kafkaDemoTopic 1 2 3 |
Please watch the video below for additional details.
Download working source code from
Zuul – Service Gateway for Spring Microservices – 2
This is a continuation of my previous post. I would recommend you to watch the video in the previous post. In this post, we will discuss filters in Zuul, besides custom routing.
Zuul gives you the ability to customize the routes to the services. For example, if you have a service URL like http://ZUULGATEWAY/serviceb/contact, to make it short you can map it as below. This lets you call the same service as http://ZUULGATEWAY/sb/contact
|
1 2 3 |
zuul: routes: serviceb: /sb/** |
Filters
The main feature that Zuul give you is the ability to use the
- Pre
- Post
- Route
Please watch the following video for details about the filters.
Zuul – Service Gateway for Spring Microservices – 1
In a distributed architecture like a microservices, you’ll need to enforce cross-cutting concerns like security, logging, tracking etc across all the microservices and not to leave it to the individual services.
Zuul will act as a service gateway and sits between a service client and service discovery agent like Eureka. With this set up it is possible to call Zuul, instead of calling services directly, as we did before. As all the calls go through Zuul, you can enforce cross-cutting concerns with various filters.
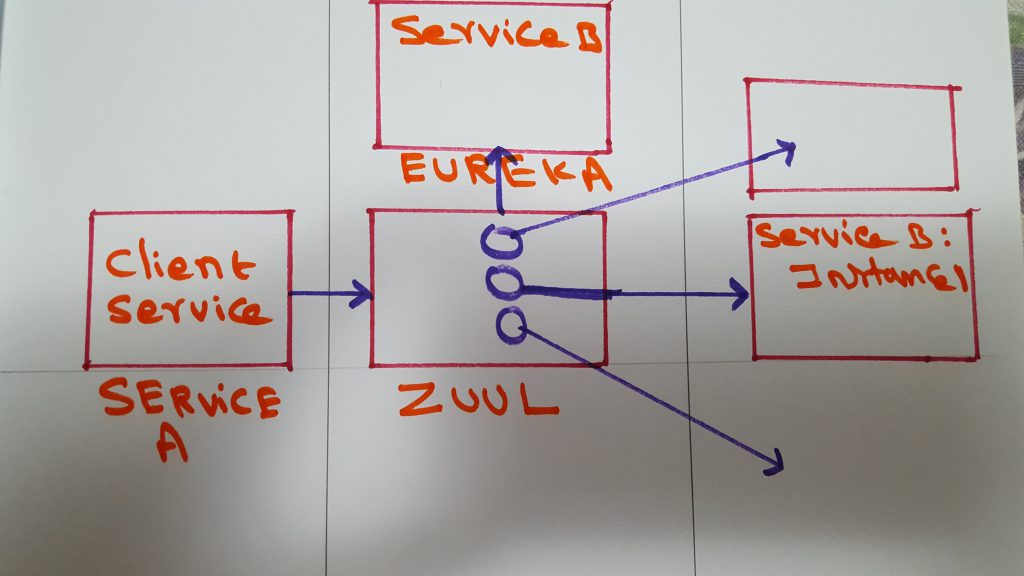
It would be a lot to cover all of Zuul in one post, instead, I am going to split it into 3 different posts. In this part one, I want to cover the basics of Zuul and show you how to set it up.
Please check the video below on how to set it up and test.
Hystrix – Spring Microservices
Microservices are distributed by nature, which makes responding to failures challenging. Imagine that service C calls service B, which in turn calls service A. If a call to service B fails, how do we figure out, which of the services in the chain failed. Is it service B? Or Is it service A that propagated to service B?
There also a video version of this post on youtube, I added the link at the bottom.
Hystrix comes to the recuse to resolve these issues inherent to Microservices. In order to enable Hystrix, we will need to add @EnableCircuitBreaker to your main application class.
In addition to clientside load balancing as discussed in my previous post, there are other 3 main strategies to deal with these issues.
Circuit breaker, if a call from service C to service B is taking too long, Hystrix will kill the call. If the call is failing consistently, Hystrix will trip the circuit and prevents future calls to service B. In order to do this, all you have to do is add @HystrixCommand to the method that is calling service B, like below.
|
1 2 3 4 5 |
@HystrixCommand public String contactServer() { String url = "http://SERVICEB/contact"; return restTemplate.getForObject(url, String.class); } |
Fallback, acts similar to the circuit breaker, but instead of just breaking the circuit, it will call a method provided as a fallback, like below.
|
1 2 3 4 5 |
@HystrixCommand(fallbackMethod = "contactBackupServer") public String contactServer() { String url = "http://SERVICEB/contact"; return restTemplate.getForObject(url, String.class); } |
In this case, Hystrix will call
|
1 2 3 4 5 6 |
@HystrixCommand(fallbackMethod = "contactBackupServer", threadPoolKey = "licenseByOrgThreadPool") public String contactServer() { String url = "http://SERVICEB/contact"; return restTemplate.getForObject(url, String.class); } |
The above code will use a separate thread pool called licenseByOrgThreadPool. This is helpful in preventing thread exhaustion when some services take longer than others. By using bulkhead you can have different thread pools for different remote service calls and custom configure each.
Download code from GitHub, it is in a hystrix folder.
Client Side load balancing with Ribbon
When you have multiple instances of Microservices, having a traditional load balancer like F5, HAProxy becomes a single point of failure, if the load balancer fails. To prevent this we can use Ribbon for client-side load balancing.
Client-side load balancing involves having the client look up all of the service instances from Eureka and caching the physical locations locally on the client side. This way, when it notices a problem with any of the instances, it removes that instance from the local cache and prevents any future calls to that service instance.
Spring Cloud has built-in support for Ribbon. To turn it on, make sure you have fetchRegistry set to true like below, this tells client services to get physical locations of instances registered on Eureka and cache locally. For example, if service B is calling service A, do the following in service B.
|
1 2 3 4 5 6 7 8 |
eureka: client: registerWithEureka: true fetchRegistry: true serviceUrl: defaultZone: http://localhost:8761/eureka/ instance: hostname: localhost |
Next, create a RestTemplate bean as shown below in your main application class.
|
1 2 3 4 5 |
@LoadBalanced @Bean public RestTemplate restTemplate() { return new RestTemplate(); } |
Now, all you have to do is
|
1 2 3 4 5 6 7 8 9 10 11 12 13 |
@Component public class RibbonClient { /*Because @LoadBalanced and @Bean exist in main app class, Spring automatically injects Ribbon enabled Rest template.*/ @Autowired RestTemplate restTemplate; @RequestMapping("/cotactserver") public String cotactserver() { String url = "http://SERVICEA/contact"; return restTemplate.getForObject(url, String.class); } } |
Here is the video for this post.
Dockerizing Microservices
The main advantages of containerizing the microservices are
- It makes applications portable, as dependencies can be packaged together with applications. For example, if one application needs JRE7 and the other needs JRE8, they can be packaged separately with their respective dependencies and deployed on a server, regardless of what JRE version exists on the server.
- It removes the bottleneck of being limited by a number of servers during the release process, as you can deploy multiple versions of the same image or multiple features at the same time. For example, you can deploy multiple features for QA at the same time, regardless of how many servers you have.
- You can start multiple instances of the application to handle increasing load.
- As the containers can be isolated from each other, it will help in security.
Docker is a command line program, a background daemon. Docker containers run natively on Linux and share the kernel, making it very light weight as compared to VMs.
In this post, we will containerize a Spring Microservice with Docker. First, install Docker and make sure it is working as listed at Install Docker.
Then go to Spring Initializer site and add Web as a dependency and click on Generate Project to download a template project. Import the project into your favorite IDE and add the @RestController annotation to the main class. Add additional method with @RequestMapping as shown below.
Run the application and go to http://localhost:8080 and you should see “My First Dockerized Microservice” in your browser. This ensures, our service builds and runs fine without Docker. Stop the application and close your IDE.
Add a file called Dockerfile to the project directory and copy and paste the following contents into it.
|
1 2 3 4 5 |
FROM openjdk:8-jdk-alpine VOLUME /tmp ADD build/libs/microservice-docker-0.0.1-SNAPSHOT.jar app.jar EXPOSE 8080 ENTRYPOINT ["java","-jar","/app.jar"] |
Change the name of the jar file to your jar file in the 3rd line. In my
FROM tells Docker to install the image from Docker
VOLUME specifies a directory outside the container, where Spring Boot creates working directories for Tomcat
ADD tells Docker to add the specified jar file to the image as app.jar
EXPOSE tells Docker to expose this port to the outside world.
ENTRYPOINT tells Docker to execute the app.jar file.
That is all you need.
Now go to the Terminal and cd to the project directory and execute the following commands.
|
1 2 3 |
docker build -t containerizedms . (this will build Docker image, change the last argument name as you like) docker run -d -p 8080:8080 containerizedms (this will create a container from above image and map port 8080 inside the container to 8080 of the host machine) docker ps (check if the container is running) |

Click on http://localhost:8080 and you should see “My First Dockerized Microservice” in your
In the 2nd command -d tells Docker to run it as detached so your Terminal is not tied up. Port number on the left is host machine port, it can be any valid port. Docker container is an instance of an image. Think of an image as a Java class and a container as an instance of that class.
Once, you are done stop and remove containers with the following commands. Note that, each time you use Docker run, it creates a new container from the image.
|
1 2 |
docker ps (shows all the running containers along with container ids) docker rm <container id> (This will delete the container) |
Download Source code from Github.
Microservices – Service Registration and Discovery with Eureka
As you create more microservices, it is hard to keep track. Eureka helps in discovering and locating the services. It acts as a load balancer and service registry. All the services are identified by their names without port information. If service A running on port 8080 at URL http://localhost:8080 registers itself as SERVCIEA on Eureka, other services on Eureka can call it as SERVCIEA instead of calling http://localhost:8080.
If you rather watch the video on what’s in this post, see below, otherwise continue reading.
Eureka acts as an internal DNS and middle tier load balancer. With Eureka, load balancing happens at the instance level and the client instances know the information about which servers they need to talk to, making it ideal for the client-based load balancer.
To implement it follow the steps listed below.
Go to https://start.spring.io/ and download the project with Eureka Server as a dependency.
Add the following text to the application.properties.
Below, we are configuring the name for this service, port to run at and telling it not to register itself as a service.
|
1 2 3 4 5 6 7 8 |
spring.application.name=eureka-service server.port=8761 eureka.client.register-with-eureka=false eureka.client.fetch-registry=false logging.level.com.netflix.eureka=OFF logging.level.com.netflix.discovery=OFF |
Add the following annotation to SpringBoot main class and run the application.
|
1 |
@EnableEurekaServer |
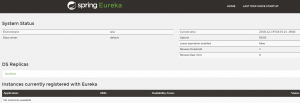
Now go to http://localhost:8761/ and you should see a screen like this.
Create 2 additional microservices, so they can talk to each other via Eureka.
Go to https://start.spring.io/ and download 2 projects with Eureka Discovery as a dependency. One would be ServiceA and other would ServiceB.
Add the following annotation to Spring boot main classe for both ServiceA and ServiceB applications.
|
1 |
@EnableDiscoveryClient |
Create application.yml in both the applications in resource folders.
Add the following in serviceA’s applcation.yml, the name of this application, port and Eureka information to register itself as a service with Eureka.
|
1 2 3 4 5 6 7 8 9 10 11 12 13 14 15 |
spring: application: name: serviceA server: port: 8080 eureka: client: registerWithEureka: true fetchRegistry: true serviceUrl: defaultZone: http://localhost:8761/eureka/ instance: hostname: localhost |
Add the following in serviceB’s applcation.yml
|
1 2 3 4 5 6 7 8 9 10 11 12 13 14 15 |
spring: application: name: serviceB server: port: 8081 eureka: client: registerWithEureka: true fetchRegistry: true serviceUrl: defaultZone: http://localhost:8761/eureka/ instance: hostname: localhost |
Add the following endpoint to Spring boot main class in ServiceA.
|
1 2 3 4 5 6 7 |
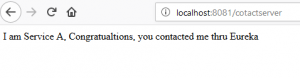
@RestController class MessageRestController { @RequestMapping("/contact") public String contact() { return "I am Service A, Congratualtions, you contacted me thru Eureka"; } } |
We will be calling this endpoint “/contact” from ServiceB.
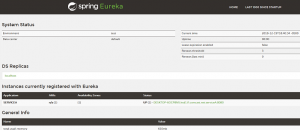
Go ahead and run ServiceA and go to http://localhost:8761/ you should see ServiceA listed as below with Eureka.
Add the following to Spring boot main class in ServiceB to call the ServiceA’s endpoint above.
|
1 2 3 4 5 6 7 8 9 10 11 12 |
@RestController class MessageRestController { @Autowired private RestTemplate restTemplate; @RequestMapping("/cotactserver") public String cotactserver() { String url = "http://<strong>SERVICEA</strong>/contact"; return restTemplate.getForObject(url, String.class); } } |
Notice the URL in the code above, we are not referencing ServiceA with complete URL as http://localhost:8080, rather with the name that it registered itself with Eureka.
Run ServiceB and check Eureka http://localhost:8761, it should show both the services.
Go to the above endpoint http://localhost:8081/cotactserver it will call SERVICEA and you should see the output as below.
Download eureka.zip for source code in my Microservices Git repo
Here are few links for additional information.
https://spring.io/guides/gs/service-registration-and-discovery/
https://github.com/Netflix/eureka/wiki/Eureka-at-a-glance
Microservices – Getting Properties from Config Server
In the previous post, we talked about standing up a Spring Cloud Config server. In this post, we will discuss how client applications can get different properties for different environments like development, test, production etc from the Config server.
If you rather watch the video on what’s in this post, see below, otherwise continue reading.
First, let’s make sure, your Config server is running as indicated in the previous post.
Next, create a client application to test the Config server. Go to the Spring Initializr site https://start.spring.io/ and in the dependencies search box add web, config client dependencies (notice that for the Config server in the previous post, we added Config server as a dependency) and click on Generate Project to download an empty Spring boot project.
Create a file named bootstrap.properties or bootstrap.yaml in the resources folder and add the following properties.
|
1 2 |
spring.application.name=clientapp spring.cloud.config.uri=http://localhost:8888 |
The first property sets the name of the application. Note, this should exactly match the name of the properties file you created in the previous post (remember you created a property file called clientapp.properties). This is how the Spring Config server knows, what properties to serve to this application.
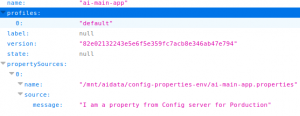
The second property indicates where the Config server is running. To see what properties are available to this application from the Config server go to http://localhost:8888/clientapp/default.
To your main class add a RestContoller
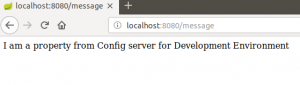
Start the clientapp application and go to http://localhost:8080/message in your browser, you should see I am a property from Config server for Development Environment.
How to specify environment specific properties
Go to the Git repo you created in the previous post and create a new branch for the production environment.
|
1 2 |
//This will create a new branch called production from master git checkout -b production master |
Now, edit clientapp.properties as shown below and commit the change.
|
1 |
message=I am a property from Config server for Production Environment |
In your clientapp project add an additional property to bootstrap.properties
|
1 |
spring.cloud.config.label=production |
This specifies which Git branch you want Config server to serve your properties. If you do not specify the label, Config server uses master branch by default.
Here is the whole bootstrap.properties.
|
1 2 3 |
spring.cloud.config.uri=http://localhost:8888 spring.application.name=clientapp spring.cloud.config.label=production |
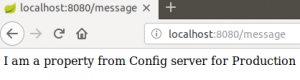
Restart the clientapp application and to go to http://localhost:8080/message in your browser, you should see I am a property from Config server for Production Environment.
Download the sample code from my microservices Github repo.
Final Thoughts
Instead of using different branches to store properties for different environments, you can also use different repos.
In most cases, you can also use application.properties instead of bootstrap.properties. but note that bootstrap gets higher precedence. I think it is better to keep external properties in bootstrap and the rest in applcation.properties for a clean separation.
Spring Microservices – Externalizing Application properties with Config Server
When multiple microservices are moving through a release cycle from development, test, UAT to production, it is a big setback to on-demand release process to update environment specific properties like DB connection strings, message broker parameters, email server properties etc. for each of the environments.
Spring Cloud Config server resolves this issue, by moving the properties out of the applications and centralizing them. There is no need to keep updating properties from one environment to the other, as applications move along in the release process. This offers a lot of flexibility and speeds up the entire deployment cycle.
With Config server, you have a central place to manage the properties across all environments.
Download sample code from my microservices Github repo
Git Repository
For a configuration server to serve properties to client applications, it needs to be pointed to the source where properties exist. While you can use a file system or database, in this post we focus on Git repo backed Config server which is the most common set up.
Create an empty folder called config-properties-env anywhere on your system and inside the folder create a file called clientapp.properties. Add the following to the file and save.
message=I am a property from Config server for Development Environment
Initialize a Git repo, add the file and commit.
|
1 2 3 |
git init git add client.properties git commit -m"dev properties" |
Config server
Standing up Spring Cloud Config server is very easy, it is like any other microservice with an additional annotation and a dependency.
Go to the Spring Initializr site https://start.spring.io/ and in the dependencies search box, add Config server, web dependencies and click on Generate Project to download an empty Spring boot project.
Add @EnableConfigServer annotation to the main class, as shown below.
Add the following to the application.properties file.
|
1 2 3 4 |
server.port=8888 spring.cloud.config.server.git.uri=/mnt/aidata/config-properties-env #(This should be the path to properties file on your system) |
Now run the project and go to http://localhost:8888/clientapp/default, this should show the property you just added to the clientapp.properties.
You have now successfully set up the Config server and ready to serve the properties to the client applications.
Here is the video version of it.
In the next post, I will discuss how client applications can use the Config server to get properties, how to organize properties for different environments, and how to encrypt passwords in property files.